
How to use your MycoPunks Mushroom Grow Kit
WHEN YOUR PARCEL ARRIVES
I can't stress this enough, the number one reason contamination occurs is when grain is left in the mailer bag or box. Condensation causes a breeding ground on the filter patches of the grain and substrate bags. They should be stored upright with the filter clear of obstruction in a cool dry place like a cupboard.
We do our best to pack things well, but parcels do occasionally arrive (after a lengthy process of being dropkicked through a delivery network) damaged. Check the gussets and seals of the bag for air leaks and don't inoculate until you are sure they are damage free.
See the "Whats in the kit?" section below. If you are missing anything, let us know using support system.
Any issues with your parcel
What's in the kit?
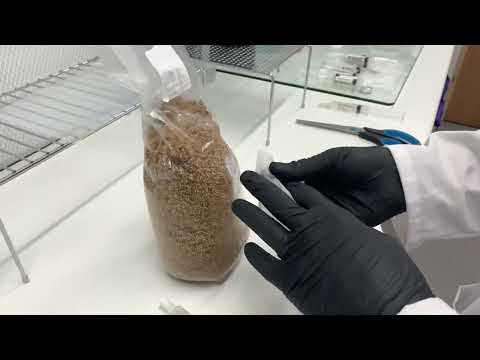
Grain of choice

All of our grain bags will be inoculated in the same way. You'll notice a white filter patch on the top end to allow airflow but block contamination (mycelium breathes oxygen and breathes out carbon dioxide). On the bottom end you'll see an injection port (little grey or black square in a clear pouch).
Substrate

Your substrate is ready to use out of the bag, do not open until your grain is fully colonised with mycelium. It contains, organic coco coir, fine vermiculite and agricultural gypsum. It's pasteurised to kill of any contamination and is at "field capacity" which means the moisture is perfect already.
Accessories

Gloves in your chosen size (unless you asked not to include them).
A larger disinfectant hand wipe and a smaller wipe for wiping your injection port during inoculation. An elastic band and four paper clips for the fruiting stage of your grow.
What is the difference between spores and liquid culture?
I'm not going to go into too much detail here about what spores are and how mycelium works, I'll just briefly touch on the pros and cons. The first downside to spores is the additional time required for spores to germinate (can be around 5 days) before they even start producing hyphae. The most problematic issue with spores is that they are not a sterile product. They are non sterile spores suspended in sterile distilled water. When collecting spore prints from the gills of mushrooms, there can be contaminants present which pop up during the growing process.
Conclusion: Using spores to grain is easier but is not going to produce consistent successful grows when using directly with grain.
Liquid culture is mycelium suspended in a sterile nutrient broth, it is a sterile product when produced correctly. There is no additional waiting time for LC as it's established mycelium already.
Conclusion: You won't get problems with contamination using liquid culture if everything goes well.
Lets get started!
Stage one : Grain spawn
1. Gather your supplies
You will need the following items which aren't included in your kit:
- A clean liquid culture or spore syringe
- Household bleach spray or isopropyl 70% spray
- Paper towels / kitchen roll
...and from your kit:
- Gloves
- Large disinfectant wipe for your hands
- Your grain bag
2. Clean your workspace
You don't need to be perfect here, whilst inoculating in a still air box will decrease your chance of contamination you should at minimum create a draught free space by closing windows and doors. Put on your gloves. Using a household bleach spray or 70% isopropyl spray, clean down your work surface and allow to dry.
3. Grain inoculation

2-3ML is fine. No more!
MycoPunks Video on how to inoculate your grain.
- Remove your syringe from it's packaging. Don't remove the lid yet.
- Shake the syringe for 20 seconds to break up any mycelium or clumps of spore in solution.
- Wipe down your hands with the large hand wipe.
- Remove the small wipe, and wipe down the injection port on the grain bag.
- Using the same wipe, wipe down the syringe including the cap.
- Carefully remove the lid from your syringe without letting anything come in contact with the nozzle.
- Carefully remove the needle with it's lid from the sterile packaging. Ensure nothing comes into contact with the plastic part on the needle which would compromise sterility.
- Twist the needle onto the end of the syringe (turning to the right until it's very tightly on).
- Very carefully remove the lid from the syringe and set aside. Don't frantically email us if asking if spores can grow in human blood stream (sorry, they can so say your goodbyes now [this is a joke]).
- Insert the needly fully into the centre of the injection port and inject 2-3ML of liquid culture or spore solution. DO NOT INJECT MORE THAN 3ML OF SPORE SOLUTION OR YOU WILL CREATE WET SPOTS IN THE GRAIN WHICH WILL TURN BACTERIAL.
- Remove the needle from the bag and carefully put the lid back on.
- You can now remove the needle and replace the cap on your syringe. (Phew you didn't stab yourself!)
Stage two: colonisation of grain spawn
1. Conditions
Your inoculated grain bag needs warm and dark conditions until it is fully colonised.
20-25C IS GREAT!
Nothing warmer or you will damage and likely kill the mycelium or dry out grain in the bag which won't colonise. Any cooler and your mycelium will slow down and take forever to colonise the grain.
My brother / sister in CHRIST Do not use a heat mat! This will be too hot and will dry out the bottom most grains in your bag and prevent colonisation.
Ideally you want ambient warm conditions (an airing cupboard could work) or a cupboard with a small heater on a thermostat.
2. How long till I see growth?
If you email us asking this, I'll give you a dead leg. Patience is key with this game. If you used spore solution, expect 14 days before you see your first signs of mycelial growth. No signs of growth at day 20? See our troubleshooting section below.
3. Break and shake
Once your grain is approximately 20% colonised you should do a "break and shake".
Do not haymaker this grain bag please. Don't go so hard you break the bag open, you want to massage the mycelial bits to break apart all the clumps of mycelium and then redistribute those grains around the bag by turning the bag end over end.
Mycelium will now have loads of new jumping off points throughout your grain bag. This will substantially speed up the colonisation process.
If you've left it late, the break and shake is still beneficial up to 30-40%, you can also do a partial break and shake where you break up some of the mycelium and leave a large bit intact at the bottom of the bag.
4. Full colonisation
If you put your grain to substrate before all grains are colonised your chances of contamination are hugely increased as you give moulds and yeasts delicious food to eat. Your grain should be covered in nice white mycelium with no weird coloured moulds growing.
Struggling to with this bit? See troubleshooting below.